Did you know that the average American spends about $550 per month on groceries? And of that, fruits and vegetables make up a good portion of that number. But what if we told you that there are plants you can regrow from the scraps you typically throw away?
That’s right; it’s possible to grow your own produce by regrowing vegetables, fruits, and herbs, and producing your own crops. And we have 40 of the best plants you can regrow using the scraps from your kitchen.
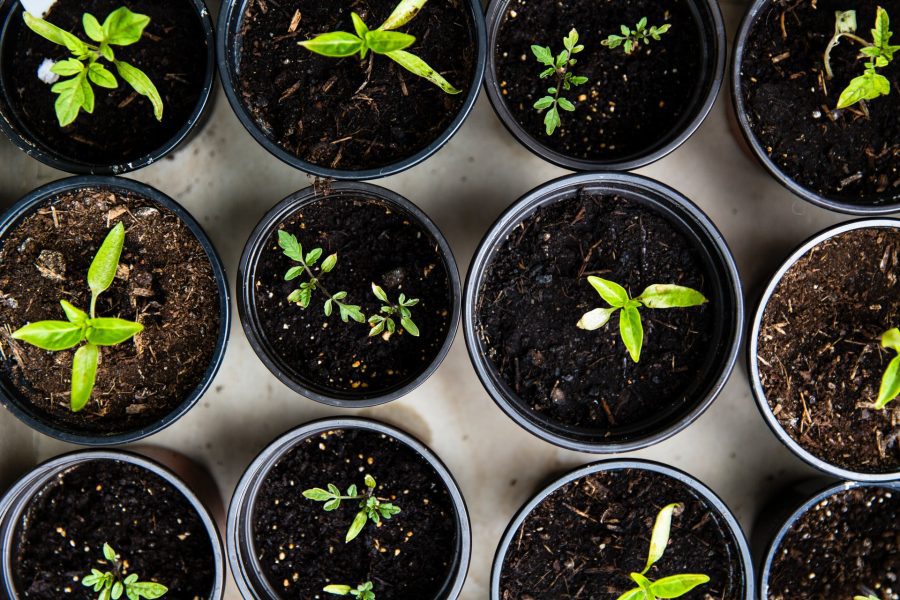
Plants You Can Regrow and Produce Fruits, Herbs, and Vegetables (Video Tutorials)
When creating your scrap garden, it’s important to know that you should handle each of the food scraps differently. Here is a quick overview of each.
1. Apples
If you’re an apple lover, we have great news for you. You can use the seeds from the apples you eat to grow your very own apple trees. And amazingly, it’s not difficult to do. However, don’t plan on getting the same variety of apples from the seed that you plant that you think you might.
You will need an apple, a plastic Ziploc bag, and a paper towel. Start by removing the seeds from an apple. Then fold the paper towel in half and dampen it. Place the apple seeds on one-half of the paper towel and cover them with the other half. Insert the paper towel into the plastic bag.
Next, put the plastic bag in your refrigerator and leave it there for three weeks. When you take it out, the seeds will have sprouted. Now it’s time to put the seeds in some soil. Using a small pot filled with potting soil, place each of the sprouted seeds in a small indentation and cover them with dirt.
It’s important to sprout and plant more than one apple seed because apple trees need other apple trees to pollinate their fruit. Once your seeds have grown some, and the weather outside is on the cooler side, you can plant your new apple trees directly into the ground.
Here’s a quick video that shows you the process:
- Built-in Heater: iPower Heating Propagation Tray comes with a vented humidity dome, which can help regulate moisture and...
- 3-in-1 Design: Flat tray, cell tray and humidity dome, 3-in-1 design. 24 Cell plug insert seedling tray with round drain...
- Easy to Use: Ideal for seed propagation, especially in cold temperature. It will keep the seedling at a constant...
2. Apricots
Do you love apricots? Then you will be happy to know that it is one of the plants you can regrow from scraps. You will use the pit inside of an apricot that you purchase from the grocery store. Here’s how to do it.
Place the pit inside a glass of water. If the pit stays on the bottom of the glass, it is viable. If it floats to the top, the seed won’t sprout. In this case, eat another apricot and tests that seed.
Then, place the pit in a small container filled with potting soil. Add more soil to the top of the pit and put it in the fridge. Leave it there for three months. The pit will grow roots during that time.
Now, take the container out of the fridge and put it in a warm spot that receives sunlight. Leave it there until it begins to sprout. Once the sprouts are at least 12 inches high, you can plant it in the ground.
Here’s a video that gives you an alternative method:
3. Avocados
Did you know that you can use the seeds in your avocados to grow avocado trees? It’s true. Keep in mind that avocado trees grown this way will take a few more years to bear fruit than those you purchase, but if you have the patience, you can get an avocado tree for free!
To do it, place two toothpicks in the sides of the avocado seed. Using the toothpicks, suspend the seed over a bowl containing water. Don’t allow the water to cover more than an inch of the seed.
Check the seed every day and maintain that water level. Then, after about six weeks, roots will appear along with a stem. When the stem grows to six inches, cut it back to half of its size.
Finally, when you see leaves growing on the stem, you can plant the avocado tree outside to grow to its full height. When planting it, only cover half of the seed for the best results.
An alternative method is to soak a paper towel and wrap the avocado seed in it. Insert the seed into a plastic bag. Let the bag sit for about four weeks until the roots are strong enough to transplant. Finally, transplant the seed into the soil, only covering half of the seed.
Here’s a video that explains the second method in detail:
4. Basil
If you cook Italian food, you definitely want to know how to regrow basil from scraps. And luckily, it’s one of the plants you can regrow from cuttings.
To grow this amazing herb, start by cutting the stems from your bunch of basil. Make sure the stems you want to plant are at least four inches tall. Place the stems in a glass of water, making sure the leaves are well above the waterline.
Find an area that is bright, but avoid putting it in an area that receives direct sunlight. Watch the stems, and when roots begin to form on it, replant it in a pot filled with potting soil or directly in your garden.
Here’s a great video about how to regrow basil:
5. Bean Sprouts
Eating sprouts is one of the best ways to get added nutrition in your diet. And luckily, bean sprouts are one of the plants you can regrow from scraps. Instead of using an end piece or portion of the bean, you will use a whole bean.
You can sprout any bean, but many people like to sprout mung beans and wheatberries. To sprout the bean, place a handful (or however many sprouts you want) into a glass jar with a piece of cheesecloth on top of it secured by a canning ring or rubber band.
Let the beans soak overnight. In the morning, empty the water and rinse the beans with fresh water. Place the beans in a sunny spot. Do this for several days. By the fourth day, you should have sufficient sprouts on your beans to eat them, but you can let them grow as long as you like.
Here’s a video that takes you step-by-step through the process:
- OUR CLASSIC VARIETY PACK contains a well-balanced assortment of seeds for sprouting and microgreens. All heirloom &...
- SUPERFOOD MICROGREEN MIX is a colorful & delicious blend that contains broccoli seeds, radish, purple kohlrabi, collard...
- RAINBOW RADISH is a zesty sprouting mix that adds just the right spice & color to your dish. Contains our top 3 heirloom...
6. Beets
You can do a lot with beets. You can juice them, roast them, or even can them. That’s why knowing how to regrow beets is so essential. Luckily, the process is easy.
To regrow beet greens, cut off the beet’s top portion, leaving at least one inch of beet. Then, place the beet top in a bowl filled partially with water. After a couple of days, green shoots will begin to grow from the beet top.
Once you see these sprouts, let them grow to at least two inches. Then, it’s time to transplant your beets so it can grow new beet greens. While they will not grow a new beet, the greens can be used in salads and stir fry, and once seeds develop you can plant those for full roots.
To do so, you can transplant it directly into your garden. If you don’t have a garden, fill a pot with potting soil, and dig a small hole in the center of it. Then, place the beet top in the soil, leaving the very top part of it exposed.
Here’s a cool video about how to regrow beets:
7. Blueberries
The price of blueberries continues to rise. Fortunately, blueberries are one of the plants you can regrow, and you will have your own blueberry bushes. Here’s how to regrow your blueberries, so you never have to buy them again.
Start with store-bought blueberries that come from the U.S. If you purchase blueberries from another country, the law requires radiation, which renders the seeds useless. Carefully cut the blueberry in half to expose the seeds. Ensure that you use the red and brown seeds inside as they are the more potent ones.
Fill a small pot with potting soil. Blueberries prefer soil with a high pH level, so look for soil that has one. Then, lay the open blueberries on top of the soil. Cover the blueberries with more soil and pat it down to ensure that no blueberry area is exposed. Lightly water the seeds.
Put the pot in an area that receives direct sunlight and wait a couple of weeks for the seeds to sprout. Once spring arrives, you can transplant the blueberries outside in a pot or directly in the gound.
Watch this video to watch step-by-step how to regrow blueberries:
8. Bok Choy
One of the easiest plants you can regrow is bok choy. To grow this delicious crop, save the base after you’ve eaten the leaves and peel away the outer layers. Then, place it in a small bowl with an inch or so of water.
In a few days, you will see roots beginning to grow on the base. You may even see new leaves sprouting.
Once you see this activity, it’s time to get the plant out of the water and into some soil. Remember, plants need nutrients from the soil to sustain their growth.
Here’s a quick how-to video on regrowing bok choy:
9. Cabbage
In some areas, cabbage has a short growing season, so it’s good to know it is one of the plants you can regrow. To do it, save the cabbage base and place it in a shallow bowl of water in the sun.
Once you see leaves appear and the plant develops roots, replant it in a pot or directly in the soil outside.
Here’s a video that shows you what’s possible when it comes to regrowing cabbage from scraps:
10. Carrots
Carrots are one of America’s favorite vegetables, and that’s why it’s so great that you can easily grow carrot greens from carrot scraps.
Start by cutting off the top of the carrot. Be sure to leave at least an inch of carrot on the top. Fill a bowl with water, putting enough in there to just cover the base of the carrot.
Put the carrot in a warm spot in your home (or outside if the weather is right) that receives direct sunlight. Allow the carrot to sit there for a few days until you see sprouts growing out of the carrot top. Let the sprouts grow until they reach about two inches in height.
Once the sprouts reach two inches, you can plant the carrot in a pot. If you are growing more than one carrot from scraps, plant the carrots about four inches apart in the pot. And if you plant the carrot in your garden, space them evenly in rows.
Like most root vegetables, you won’t grow full carrots from this, but if you allow the greens to mature, you can harvest seeds that will grow full carrots.
Here’s a video to help you with the process of how to regrow carrots from scraps:
11. Celery
If you love celery, you won’t have to worry when you eat the last stalk. That’s because it’s one of the plants you can regrow. Instead, save the base of the celery and place it in a bowl of warm water. Then let it sit in the water until new leaves begin to develop on it.
Once the base has some new leaves and the roots develop, plant the celery base in a pot with potting soil or directly into your garden.
Here’s a video that shows you how easy it is to regrow celery:

- 100% USA HEIRLOOM VEGETABLE SEEDS - These open-pollinated, non-hybrid, raw, chemically untreated heirloom seeds for...
- PERFECT FOR SURVIVALIST, PREPPER SUPPLIES, & EMERGENCY SUPPLIES - These heirloom seeds are perfect for emergency...
- PLENTIFUL HARVEST - You can harvest up to 15,000 fruits and vegetables from 3,000 seeds per variety seed pack, such as...
12. Cherries
If you live in a climate with at least one freeze a year, you can grow cherries from scraps. If you don’t live in a climate where it freezes, a cherry tree will never produce fruit. Growing a cherry tree from scraps involves taking out the seeds and propagating them.
When you take the cherry pit out of the cherry, you will need to break it open to release the seed. That is best done delicately with a pair of needle-nose pliers. Then, clean the seed and pat it dry.
Place a damp paper towel on the bottom of a small container. Put the cherry seeds on the paper towel and cover it with another damp paper towel. Next, put the lid on the container, and place it in the refrigerator for one week.
Once the seed has been in the fridge for a week, it’s time to remove another seed layer. You can remove this outer layer by gently scraping it away. The inner seed will be brighter. Place these seeds in a similar container as before and put them back into the fridge for another week.
That allows the seeds to germinate and grow roots. Take the seeds and put them in a pot filled with potting soil. Then place the seeds in the dirt, root side down, and wait for your cherry tree to begin growing!
Here’s a video that shows the process:
13. Cilantro
So many people think of cilantro as a necessary part of cooking. That’s why it’s essential that you learn how to grow cilantro from cuttings. You can purchase a bunch of cilantro from the grocery store and then grow your own after that.
Start by cutting three to four-inch pieces off the ends of the cilantro and placing them in water. Put the container in a sunny spot and wait for the roots to grow. That should take a couple of days.
After your cilantro stems have roots that are at least one inch long, you can transplant them into some dirt. Be sure to plant about 10 roots in each pot and cover all of the roots.
Here is a video that shows you how to transplant your roots into the soil:
14. Fennel
Fennel is easy to grow and produces a large plant that you can use to add more flavor to your dishes. To grow it, cut off the end of the fennel that you bought in the grocery store. You will have to leave at least one inch of root base to regrow a fennel plant.
Put some water in a bowl, stand the root on top of it, and place it someplace that offers direct sunlight. Once you see green shoots coming out of the root, it’s ready for planting. You can plant it in a pot filled with potting soil, or you can plant it directly in your garden.
Here’s a video to help you regrow fennel:
15. Garlic
Another one of the plants you can regrow is garlic. According to many cooks, garlic is the source of life. And that’s why learning how to grow garlic from scraps is such a great idea!
Start with some fresh garlic and separate the cloves. Set aside the largest cloves as those are the ones you want to regrow into another garlic plant. Mix gardening soil and compost in a planting container.
Place each clove about two inches deep in the soil and four inches apart. Be sure to place the garlic clove’s flat end down, as this is where the roots will grow from.
Water the garlic well and keep the soil moist so the roots can grow. As the weather warms up, you can reduce the watering. The garlic will be ready to harvest in about 90 days or when the stalks turn yellow and fall over.
Here is a great video showing how to grow garlic from planting to harvest:
16. Ginger
Here is some great news if you love ginger: You can grow fresh ginger from ginger scraps. Start by putting a piece of ginger root in a container with water. Be sure to empty the water every couple of days and refill it with fresh water. You will soon see roots begin to grow, and sprouts come out of the top of the root.
Once your sprouts have grown a couple of inches, and the roots look established, cut off the new sprouts. The roots are attached to this new sprout, so don’t worry about leaving them behind!
Take the sprouts outside and bury them about an inch deep in your garden soil. Ginger likes moist soil, so be sure to water it in well and keep the soil moist.
Here’s a great video that shows you exactly how to separate the roots from an old piece of ginger:
17. Hazelnuts
To regrow hazelnuts, you need to gather some hazelnuts. Ideally, you want to gather them from a tree and not the supermarket, but regrowing them from the store is possible. You can either remove the shell and soak them for 24 hours or leave the shells on and soak them for 2 to 4 days.
Plant the seeds outdoors in nutrient-rich soil and care for the seedlings until they grow strong enough to ward off attacks from pests.
Here’s a video that shows you some a method of regrowing hazelnuts:
18. Lemon
You can regrow lemons indoors or outdoors, depending on the climate where you live. Start by taking the seeds out of the lemon. Place the seeds on a paper towel or napkin and fold it into fours. Next, mix a water and hydrogen peroxide solution by placing one capful of hydrogen peroxide in a bottle of water. That will speed up the germination.
Sprinkle the mixture onto the paper towel or napkin. Then, place it into a Ziploc bag, seal it, and write the date on it. Next, place it on the countertop and leave it there until sprouts.
Once it does, you can plant the new tree directly in the ground or a pot. If you live in a cold climate, you can grow the tree indoors in a pot that receives direct sunlight.
This video shows you how to do it:
19. Lemongrass
The ability to regrow lemongrass is a major benefit to many people because fresh lemongrass isn’t easy to find. Lemongrass grows just any other grass and is one of the plants you can regrow. To regrow lemongrass, place a stalk of it in water and put it in a place that gets sunlight.
Once the roots grow to one to two inches, plant them in the soil or a pot filled with potting soil.
Here’s a video of one woman’s success in regrowing lemongrass:
20. Lettuce
How many years have you thrown away the bottom, unusable part of a lettuce head? It’s time to stop that wasteful practice! To regrow lettuce, simply place the bases of the head of lettuce in a glass or bowl containing a small amount of water. Place the lettuce in an area that gets some sun and spray it with water every three to four days.
Once the lettuce begins to grow roots and some new leaves, you can transplant it into a pot. If the season is right for growing lettuce, you can later transplant it outdoors if you wish.
Here’s a short video that shows the process:
21. Mango
It is possible to not only grow a mango tree from a mango seed, but you can do it indoors. Begin the process by removing the seed pod from the mango. Then, scrap all of the mango pulp off of the seed with a butter knife.
Once the seed is clean of mango, look for a knob-like protrusion on the seed. Then, insert the butter knife into the opposite end of the seed on the same side, and split open the seed. You may have to use your hands to pry it open. The seed is inside.
Dampen a paper towel with water and wrap the seed inside of it. Spray it again with water, insert it into a plastic bag, and tie it up. Label the bag with the date and put it in a warm spot for about two weeks until the roots sprout.
Once the seed has roots, fill a pot with potting soil and plant the seed in the middle of the pot. Keep it well watered, and never let the top inch of the soil dry out.
Here’s a video that walks you step-by-step through the process:
22. Mint
Growing mint from grocery store mint is a quick and easy way to save money. To do it, cut three to four-inch stems from the mint. Remove the bottom leaves, so only the top three to five remain.
Next, fill some glasses with water and place the mint stems in them. Within 7 to 10 days, the stems should begin to grow roots. You can now transplant the mint stems into a pot filled with potting soil and watch your new mint plants grow!
Watch this video for inspiration:
23. Mushrooms
If you’re a mushroom lover and always thought it was too difficult to regrow mushrooms, take heart. While it is more complicated than most other things you can grow, it is possible to regrow mushrooms from scraps. Stems and butts, to be specific.
You can use stems and butts of freshly harvested oyster mushrooms to make your own mushroom spawn. This is a complex process, which won’t quite fit on the page here, but here’s a video that walks you through the process:
24. Onion (bulb)
Luckily, bulb onions are one of the plants you can regrow from scraps. To regrow your bulb onions, leave the root and about one inch of the onion when you cut it. Then, place it root side down in a container of water until it sprouts.
Next, plant it in a sunny area in either your garden or in a pot, and cover it with potting soil. The root will take hold and grow a new onion.
Here is a video showing you how to regrow bulb onions:
25. Onion (green)
Green onions are another one of the plants you can regrow. For green onions, leave the root and about an inch of onion when cutting. Next, place the green onion in a dish with a small amount of water.
Be sure to change the water every day or so until roots begin to form.
At this point, you can take the onion roots outdoors to plant in potting soil or your garden. You can also leave the onion in water and rip off the tops of the onions as you need them to cook. It will continue to grow this way for some time.
Here’s a video showing an experiment about whether green onions grown in soil or water grow faster:
26. Nectarines
Regrowing nectarines is not only possible, but it’s also fun. Your first step in the process is to eat the nectarine! After that, remove the pit from it and place it in a glass of water to ensure that it’s viable. If it doesn’t float to the top, the seed will likely germinate.
Next, fill a plastic container with some potting soil. Then, add the nectarine pit to the soil and cover it with more. Place the container in the fridge for at least three months. After that, take it out of the fridge.
Place the container in a warm, sunny spot and wait for the seed to sprout. Once it does, allow it to grow to about 12 inches. Then, when the weather is cool, you can plant the nectarine tree into the ground and wait for it to start producing fruit.
Here’s a quick video that breaks down the steps:
27. Peaches
Who doesn’t love a fresh, juicy peach? If that sounds like you, here’s some great news: You can regrow peaches from the seeds inside the peaches you buy at the grocery store. Here’s how to do it.
The first step is to drop the peach pit into a glass of water. If it floats to the top, the seed is not viable. But if it doesn’t, the seed is likely viable. Once you know the seeds can sprout, fill a small container with potting soil. Then, put the seeds in the container and cover them with more soil.
Place the containers in your refrigerator and leave them there for three months. They will begin growing roots during that time. Take them out of the fridge and place them in a warm spot. In a couple of weeks, you will see sprouts begin to form. Wait until the sprouts are sturdy and then replant them into a larger pot.
Once the weather turns cold, you can plant your new peach tree in the ground.
Here’s a video that outlines the process:
28. Peppers
Whether you want to regrow bell peppers or hot peppers like jalapenos, all you have to do is take out the seeds from the pepper you are using and plant them. That’s because it is one of the plants you can regrow from seeds.
For example, if you want to regrow a bell pepper, you should start with a ripe pepper. Cut it open and take out the plump light-colored seeds, and set them aside. Then, using a strainer, wash the seeds and dry them with a paper towel.
Next, plant the seeds in a paper or plastic cup with a hole cut in its bottom. Stack that cup on top of another one that does not have a hole to create a water reservoir. Fill the cup with potting mix and press it down. Put the seeds on top of the soil and then press down the seeds about a quarter of an inch.
Now, place a plastic bag over the cup to create a mini greenhouse. Once the seed sprouts and grows to a couple of inches, you can transplant them to a larger pot or in your garden.
Here’s a visual about what to do:
29. Pineapple
Even if you don’t live in the tropics, you can still grow a pineapple from scraps. And don’t think that if you live in northern, cold temperatures, you can’t grow a pineapple. The fact is, you can grow it indoors.
Start by cutting off the top of a fresh pineapple. Then, suspend the pineapple top over a container of water using toothpicks. Now, place the pineapple and water in a spot that receives direct sunlight either indoors or outside.
Change the water every day and make sure that the water stays at a level that almost reaches the pineapple base. In about a week, you will see roots begin to grow on the pineapple base.
Now, it’s time to plant it in some soil. If you live in a warm climate, you can plant the pineapple outdoors. If you live in a cooler climate, use a pot, and regrow your pineapple indoors.
It takes about two years to grow a pineapple from scraps, but the plant will produce buds that you can plant. And those buds will only take about a year to grow a pineapple.
Here’s a video that shares an alternative way to regrow a pineapple:
30. Plums
There is nothing like a juicy plum on a hot summer day. And luckily, it is one of the plants you can regrow from the plums you buy at the grocery store. To start, eat your plum and save the pit you find inside.
Next, gather some small plastic containers and a little potting soil. Then, place the plum pits inside the container, and cover it with some more soil. Place the container inside your fridge for at least three months. After that, take the container out of the fridge.
Now it’s time to sprout the pit. Set the container in a warm spot and allow the sprouts to come to life. Once the sprouts are a few inches tall, transplant the seedling to a large pot. When the weather cools down, transplant the plum tree into the ground.
Watch this video to see the steps:
31. Potatoes
If you want to regrow potatoes from scraps, you should purchase organic or seed potatoes. That’s because most conventionally-grown potatoes are sprayed with a spud inhibitor that keeps them from sprouting.
To regrow a potato, look for potatoes that have eyes and are sprouting. Then, cut off a two-inch piece and let it sit out overnight. This forms a protective shell around the potato so it won’t rot in the ground.
The next day, take your potatoes outside and plant them about four inches underneath the dirt. In just a few weeks, you will see vines that indicated potatoes are growing below the ground.
Here is a short video that shows an alternative way of regrowing potatoes from scraps:
32. Potatoes, Sweet
Sweet potatoes are another one of the plants you can regrow from scraps. Although sweet potatoes are potatoes, you regrow them a little differently than regular potatoes. Here’s how to grow sweet potatoes from scraps.
Start with a couple of sweet potatoes in a jar with water. Let them sit for about a week, replacing the water as necessary. Soon, you will see roots develop. In addition to the roots, sprouts will begin to grow out of the top of the potato.
Once a sprout reaches about four inches, snip it off as close to the sweet potato as you can and add it to another container filled with water. After a couple of weeks, these “sweet potato slips” will begin growing roots. Once the roots are at least an inch, you can plant them in soil.
Here is an excellent video that talks you through the process:
- Made in America by the Ball Mason Jar Company
- Single-piece tunable diaphragm is easy to attach, and easier to clean because its surface is smooth without crevices
- Pediatric side converts to a traditional open bell by replacing the single-piece diaphragm with a non-chill rim
33. Pumpkin
Pumpkins are only in season one time a year, which explains their high price at the grocery store. Luckily, you only have to buy one, and you can use the pumpkin’s seeds to grow all of your own pumpkins in the future. That’s because pumpkin is one of the plants you can regrow from scraps.
Start by opening the pumpkin and taking out its seeds. Separate the good (hard) seeds from the seeds that will not produce another pumpkin (the soft ones).
Plant the good seeds in a paper container filled with potting soil. Pumpkins do not like to be replanted, so it’s important that you start them in a pot that you can place directly in the soil without removing the plant.
Here’s an excellent video full of pumpkin planting wisdom:
34. Radishes
You can regrow radishes from those that you buy at the grocery store. To regrow radish greens, first, cut the top off of the radish, leaving about an inch of radish. Be sure to leave some of the green top attached.
Next, fill a cup with water, and place some toothpicks in the sides of the radish so you can suspend it over the water. The water should only touch the radish and not cover it. Put the cup in a sunny window and wait for roots to begin to grow on the radish.
Once roots begin to grow, you can plant the radish outdoors in a pot or your garden bed.
If you want to regrow a whole radish, you can do so by cutting the bottom tip, with roots still attached, and planting that in moist soil. The small amount of root and tuber that is there will grow an entire radish.
Here’s a quick video that shows you the process:
35. Rosemary
You likely use rosemary a lot while cooking, so it’s great to know that rosemary is one of the plants you can regrow from scraps. To grow rosemary, cut a piece from the plant you bought at the grocery store and fill a glass or bottle with water.
Next, cut a stem from the rosemary and remove the leaves from the bottom. Leave the stem in the water for about a week until it begins to form roots. Then, transplant the stem into the ground or a pot filled with potting soil.
Here’s a video that shows you the step-by-step process:
36. Strawberries
Start by purchasing U.S.-grown strawberries to ensure you don’t have sterile seeds. Choose a strawberry that is a couple of days past ripeness. The seeds should be full and look like they are ready to pop off of the strawberry.
You can either let the strawberry dry out for two to three days and rub off the seeds or carefully pick them off. After that, lay the seeds out on regular white paper. Never use paper towels because it’s too difficult to remove the tiny seeds from the towel.
Fill a multiple cell tray with potting soil. Dampen the soil and make a half-inch depression in each of the cells. Then, lay a strawberry seed in each cell. With your fingers, close up each of the holes. The strawberries will germinate in about two weeks.
Here’s an instructive video that walks you through the process:
37. Thyme
One of the plants you can regrow from scraps is thyme, which is great news for those who love to cook Italian food. To regrow thyme, choose stems that are young and tender and remove the leaves from the bottom.
Next, fill a small pot with potting soil and place the stems in the soil. Cover the portion of the stems with no leaves completely with soil. Water the plant and put it in a spot that gets a lot of humidity. You can use a plastic bag to create a dome that will produce enough humidity for this.
Once roots begin to grow, you can transplant the thyme into your garden or a larger pot.
Here’s a great video that shows the process:
38. Tomatoes
Tomatoes are everyone’s favorite fruit (did you know tomatoes aren’t a vegetable?), and luckily, it’s easy to regrow a tomato from scraps. First, cut open your store-bought tomato and take out the seeds. Wash them in a strainer lined with cheesecloth because they’re tiny. And then flip them over onto a paper towel.
Using another paper towel, pat the seeds dry and allow them to stand on the countertop for at least a day until they dry thoroughly.
Once the seeds are dry, get a planting pot ready. You can use old paper egg containers or mini planting pots. Fill the containers with potting soil and place the seeds on top of the soil. Press them down slightly with your finger and then lightly water them.
After the tomatoes grow to about two inches, you can replant them in your garden or a larger pot filled with potting soil.
If you want to simply slice your tomatoes and regrow them from the slices, here’s a great video that compares that method to regrowing tomatoes with seeds:
39. Turmeric
Turmeric is one of the plants you can regrow. And if you want to grow turmeric from the rhizomes you buy at the grocery store, you can. That’s great news because fresh turmeric is expensive! So, here’s how to do it.
Place a paper towel in the bottom of a pot and add potting soil. Look through your turmeric rhizomes and find ones that have little nobs on them. Plant them in the soil with the nobs facing up. Barely cover the turmeric with soil. Water the plant and sprouts should appear in about two weeks.
Here is an excellent video that walks you through the process:
40. Turnips
Turnips are a root vegetable that is fairly easy to grow. To regrow turnips from your kitchen scraps, actually, turnip greens, cut off the top and place it in a shallow bowl of water. Watch the turnip top for a couple of days and keep the water fresh. When it begins growing roots from the top, it’s time to transplant it.
You can put the turnip tops in a container and grow the greens there, or you can plant them in rows in your garden. When they put out seeds, you can collect those seeds to grow full turnip roots.
Some people choose to skip the step of soaking the turnip tops in water and plant them directly in the soil.
Here’s a video that shows another method of regrowing turnips from scraps:
Plants You Can Regrow from Scraps: Which Will You Grow?
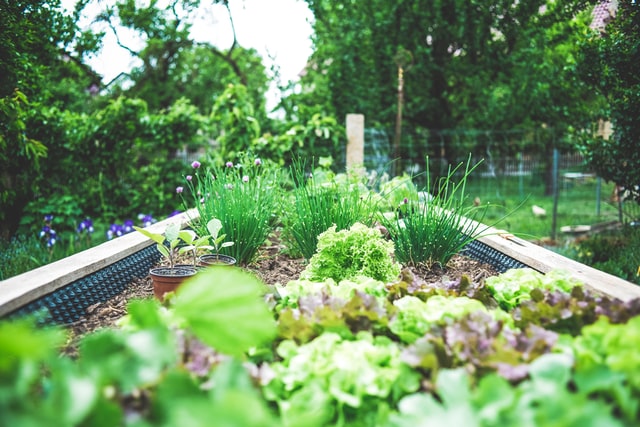
Using plants you can regrow from scraps is a great way to save money on your grocery bill. By using these techniques, you will be able to grow your own fruits, herbs, and vegetables in a garden or pots.
Do you use plants you can regrow at your home? If so, please tell us about any that we missed in the comments below!
_______________________________________________________
Suzanne Kearnes has been a freelance writer for 20 years. She writes about financial issues, entrepreneurship, and everything crunchy. She also ghostwrites books and blog posts for many other topics. You’ll find more of her homesteading advice at Grow Wherever, Freezer Guru, and BeeKeep Buzz.

Becky is a wildlife enthusiast and pet and livestock care expert with a diploma in canine nutrition. With over a decade of experience in animal welfare, Becky lends her expertise to Simple Family Preparedness through insightful info about pets, livestock, bee keeping, and the practicalities of homesteading.
Last update on 2024-04-26 at 15:24 / Affiliate links / Images from Amazon Product Advertising API