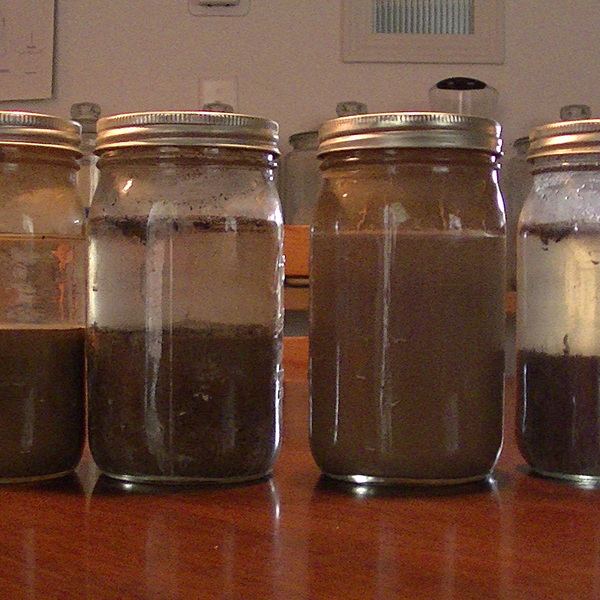
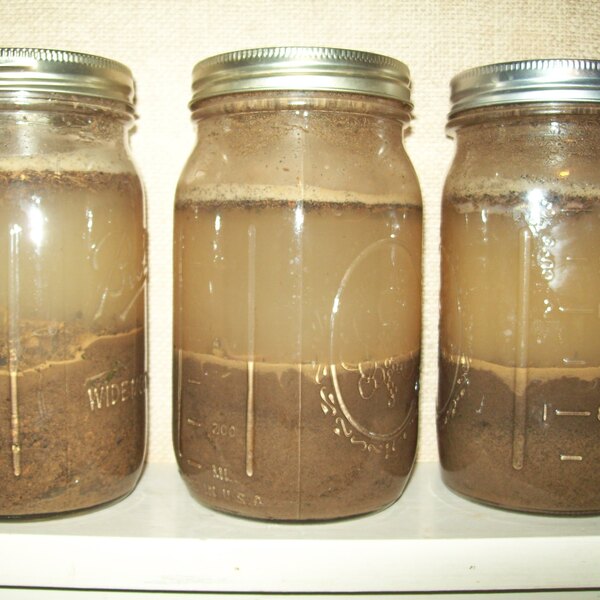
Healthy soil is essential for any environment. Whether you simply want a strong green lawn, or you’re an avid naturalist and want to understand your environment better, fostering healthy soil is the first step in the right direction. Plants need healthy soil to absorb enough water and other nutrients. Without the right soil composition, plants will die, leading to a collapse of the whole food chain. Mason jar is use on testing soil and we can learn the steps on how it is done.
Soil is made up of three main components; clay, silt, and sand. Each plays their own vital role in promoting the health of their plants. Soils with more clay retain more water, while soils with more sand drain more water. Silt on the other hand, is where soil keeps most of its nutrients. In order for plants to thrive, they must have a soil composition that suits them. For example, deserts plants may need soils with more clay, as they prefer their soil to retain water. However, tropical plants may need soil with more sand, as they prefer their soil to drain more thoroughly.
To find the best soil composition for your plant, you need to review information on its species and preferences. If you are simply monitoring the soil composition of your local environment, you should look up the ideal soil type for your neighborhood. This can often be found on your local forest department website.
Once you have the information you were looking for, it is time to test your soil to see its composition. This test is conducted with a mason jar, it will require a soil sample, mild detergent, ruler, and of course, a mason jar.
Time needed: 10 minutes.
Steps to Conduct a Mason Jar Test
- Retrieve a soil sample
Firstly, retrieve a soil sample from your desired location. In order to get the best sample possible, you should choose an area that has the most consistent soil type. Take a look at your area and see what the most common topsoil looks like, then take a sample from somewhere in the middle of this section. For example, if you are taking a soil sample from your backyard to review the health of your lawn, avoid areas close to the concrete or your garden bed, as they will have a different soil composition.
- Select ideal location
Once you have selected an ideal location, take a small shovel and scooped out about two handfuls of soil.
- Sift the soil
Prepare your soil by sifting it. Find a sift with medium-sized holes that will remove large components like bits of plant matter or stones. Place your entire soil sample into the sift and filter out all of the larger particles, collecting the sifted soil into a container.
- Place the soil sample into the mason jar
Place your prepared soil sample into the mason jar until it is about a third of the way to the top. Add water into your mason jar until it is just a centimeter below the rim. Add a teaspoon of mild detergent.
- Close and shake the mason jar
Finally, close the mason jar tightly and begin to shake it vigorously. Shake it for about three minutes. After you are done shaking the mason jar, find a spot to leave it for the next three days. Ensure this spot is level and the jar will not be disturbed once you place it there. Ideally, this spot will be in the shade, away from children or pets.
- Observe the changes after one day
At the end of the first day, you will see a line formed marking the first layer. This is your sand layer. As sand is larger and heavier than the other components, it settles to the bottom first. Use a marker to mark the top of this line.
- Check the changes after day two
At the end of the second day, you will see a second line formed on top of the first layer. This is your silt layer. As silt is a little heavier than clay, it will settle second. Use a marker to mark the top of this line.
- Mark the line after day three
At the end of your third and last day, you will see a third line formed on top of your second layer. This is your clay layer. As clay is the lightest component of the soil it will settle last. Use a marker to mark the top of this line.
- Calculates the distance between layers
To find the information you will need to perform the necessary calculations, you will need to measure the bottom of the jar to the top of the third layer. Take note of this number and write it down. Next, measure the height of each individual layer. Measure from the bottom of the first layer to the top of the first layer and record that number. Then measure from the bottom of the second layer to the top of the second layer and record that number. Lastly, measure from the bottom of the third layer to the top of the third layer and record that number.
- Use the formula to calculate the layers composition
To calculate the percentages of each component, follow this formula. Simply take the height of a given layer and divide it by the total height of all three layers, then multiply this number by 100. For example, if the height of the first layer is 2 inches and the height of all three layers is 3 inches, the formula will be (2 ÷ 3) × 100 = 66.66 which means sand is 66.66% of my soil composition. Repeat this for each layer and you will have the percentages of each component.
Applying This Information
Once you have the percentages of each component, you can now use a soil pyramid to see the exact type of soil you have. This diagram can be found on the USDA website. To use this pyramid, follow these steps. Look at the left side and find the percentage of your clay, then draw a line following the smaller guide triangles within the pyramid.
Repeat this for the right side, which is for your silt percentage, and the bottom side which is for your sand percentage. Finally, look within the pyramid for where all three of these lines connect. This point will occupy a specific soil type. For example, if my sand is 40%, my silt is 80%, and my clay is 20%, then my soil type is loam.
Use this information to adjust your soil type to your plants, or select the appropriate plants for your soil type!
Katy Willis is a writer, lifelong homesteader, and master herbalist, master gardener, and canine nutritionist. Katy is a preparedness expert and modern homesteader practicing everyday preparedness, sustainability, and a holistic lifestyle.
She knows how important it is to be prepared for whatever life throws at you, because you just never know what's coming. And preparedness helps you give your family the best chance to thrive in any situation.
Katy is passionate about living naturally, growing food, keeping livestock, foraging, and making and using herbal remedies. Katy is an experienced herbalist and a member of the CMA (Complementary Medical Association).
Her preparedness skills go beyond just being "ready", she's ready to survive the initial disaster, and thrive afterward, too. She grows 100% organic food on roughly 15 acres and raises goats, chickens, and ducks. She also lovingly tends her orchard, where she grows many different fruit trees. And, because she likes to know exactly what she's feeding her family, she's a seasoned from-scratch cook and gluten-free baker.
Katy teaches foraging and environmental education classes, too, including self-sufficient living, modern homesteading, seed saving, and organic vegetable gardening.
Katy helps others learn forgotten skills, including basic survival skills and self-reliance.
She's been published on sites such as MSN, Angi, Home Advisor, Family Handyman, Wealth of Geeks, Readers Digest, and more.


