Create an emergency toilet for a camping trip or long-distance road trips, as well as for keeping handy for emergency preparedness needs! Sometimes it’s unavoidable when nature calls. That is why prepare for your trip. It’s bothersome when you are in a tight position. With these, you will be able to dispose of your waste easily. It’s easy to make and easy to get rid of.
Have you ever taken that long family vacation with the family trickster which always ends up with someone having a potty emergency out in the middle of nowhere? Or have you ever been in a natural disaster in your area where the public utilities are no longer working?
We have talked about what we’ll do when the toilet paper eventually runs out, but what about when the toilet doesn’t work anymore?
The Usage of an Emergency Toilet
Consider this: You’ve had a major local disaster where the water has gone out. There is no water available to your house because water mains have been broken, the city water supply has been tainted and shut down, or one of the various other reasons that cause city-wide services to be shut down. What happens when Little Susie says she has to go to the bathroom?
Do you let her? Sure! In the beginning, it won’t be so hard. If you’ve got plenty of water stored up, you can use some of the non-potable water to pour it quickly into the toilet bowl. It is to help create a vacuum to flush your toilet. It’s kind of messy and splashes a lot. So, it means you’ll have to clean up each time you do it.
Why Do You Need it?
The real problem comes when the sewer lines become full and your poo isn’t going anywhere. Once that backup happens, it will be a stinky situation, in more ways than one. This would be a good time to think about filling your bathtub with water for non-potable things like watering plants and force-flushing your toilet. You can also use a WaterBob to contain it if you don’t want to keep an open tub full of water.
No products found.
No products found.
But it doesn’t take too long for the sewers to get backed up and you can’t flush any longer. THEN you’re in big trouble. Susie REALLY needs to go, but without a working sewer system, that potty water has nowhere to go. What on earth do you do now?
The problem is how to be able to go to the bathroom and not get your family sick and not feel like your house smells like a sewer. You’ll always have to worry about cross-contamination of your water supply or communal area with human waste. So, you’ll need a way to dispose of it safely and effectively.
How to Make a DIY Toilet?
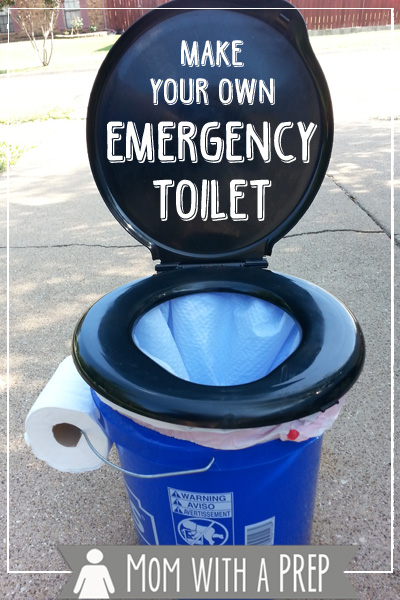
Check out how I make my DIY toilet. Here are the things that you will be needing.
What You Need to Make an Emergency DIY Toilet:
- 5-gallon bucket;
- Bag of scoopable kitty litter (regular works, too, but the scoopable helps alleviate urine better);
- Heavy-duty garbage bags (you don’t want the cheap ones that easily rip);
- Toilet seat – these toilet seats are available at most camping stores and online. They fit most standard 5-gallon buckets you can get for a few bucks at your local DIY stores.
No products found.
- Toilet paper – unless of course, you’ve come up with a few ideas of things to use when the toilet paper runs out!
How to Prepare the DIY Potty?
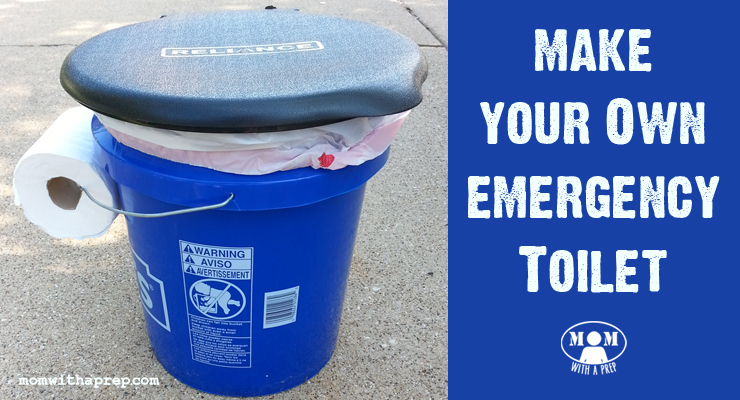
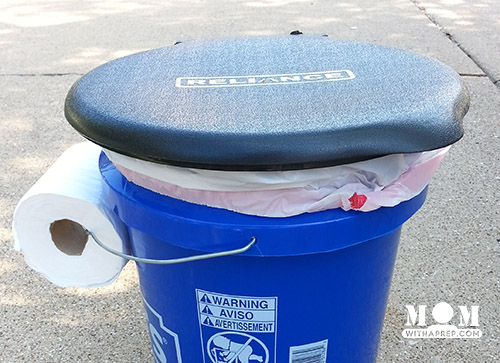
- Remove the metal handle from your 5-gallon bucket and thread the toilet paper roll on. Return the handle. This is an easy way to keep toilet paper handy without it getting dirty on the ground. Another great option is inside one of the plastic coffee cans that can serve as a protective home for it. You can also hang it using this nifty hack I found on Pinterest.
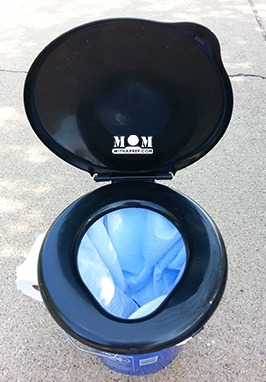
- Fit a 13-gallon trash bag into your bucket and cinch it tight around the top. This is the time you’ll want to use the cinch-top bags. You can even go with heavier-duty black trash bags if you prefer.
- Place your toilet seat on top and secure it into place.
- Keep kitty litter nearby in another waterproof canister.
How to Use the DIY Potty?
- Pee or poo as you normally would.
- Take a scoop of cat litter and cover your ‘stuff’ up.
- As the bag becomes full for you, remove and cinch the top. You can then bury it in a safe location, well away from a water source. Just be sure not to overfill. While a 13-gallon bag is more than large enough for this bucket, you don’t want to overfill the bag with waste so as not to break it when you’re moving it around, especially if you bought really cheap bags.
Setting Up an Indoor Emergency Toilet
There’s an indoor option to this. You can turn off your water supply running into your toilet, empty out the water with one more flush, scoop out any remaining water, and drain it dry. Use a similar setup as the emergency toilet above.
It will give everyone a little comfort with something familiar, even if the procedure is somewhat unfamiliar. You’ll want to be sure to plug up the hole to make sure no sewer gas smells seep out over time (just as if you were replacing the toilet and had to plug up the sewer hole). This is a great solution when you know this hack will only be needed for a short time.
How You Make an Indoor DIY Toilet?
For our family, though, this wasn’t going to be the best option for more than a few days. For one, it is hot more often than not. Our house is also not set up with a great ventilation system for cross breezes. So, the inside of the house can stay hot for a long time. Having a bucket of poo sitting in the house all the time isn’t the best option for us.
So we’ve scoped out a place in our garage where we can make a potty station. If worse comes to worst, we also have a great nook on the outside of the house where we can set up a similar station if needed, including a bolt in the fence to stick the toilet paper on when we’re out there. That’s why we love this plan.
READ MORE: Emergency Light / Camping Light with a Milk Jug
Storage for Your Toilet
You can keep a small bag of scoopable litter, trash bags, scoops, toilet paper, and some cleaning wipes stored inside of your bucket with the seat nearby in the event of an emergency.
Things to Consider When You Have a DIY Toilet
Something my friend Shelle from Preparednessmama.com taught me was to use 2 buckets for your emergency toilet. One with the liner for your solid waste and one without the liner for your liquid waste. The liquid waste can be used in the yard or garden safely (as long as you don’t have someone who is carrying a major disease).
Then you only really have to deal with the solid waste in your first bucket (have you considered humanure). You can either store it in a location away from your home for the eventual trash pickup when services resume, or you can bury it far away from a water source or your home.
Consider a Second Emergency Toilet
Consider the 2nd setup for your sick-room preps. You don’t necessarily want to be using the same emergency toilet as someone who has a gastrointestinal issue. So, you need to corner off an area as a sick room and make sure cleaning procedures are followed closely, including NOT disposing of the waste anywhere near your water source or where you are growing food.
You may want to find a way to stabilize your emergency toilet. Besides using the pre-made versions that give you a little stability, you can use milk crate+legs to give yourself less chance of tipping over.
The Pool Noodle Toilet
You’ve no doubt seen the Pinterest and Facebook phenomenon of the Pool Noodle Emergency Toilet. We made one up in about 3 minutes to show you how easy it is to set up.
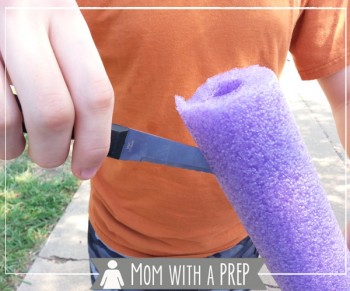
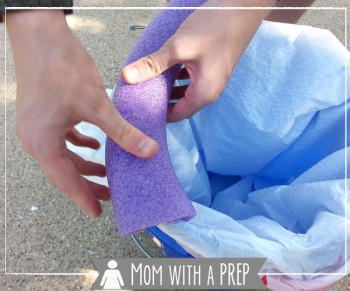
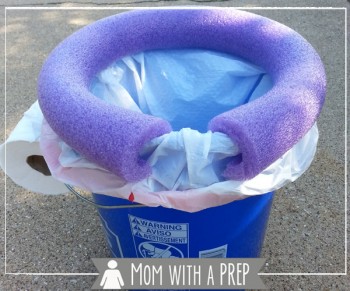
My son actually thought it was pretty comfy. But, it wouldn’t take long for that comfy to wear off as the noddle will eventually split from the use or from the weather. Also, the minute you get that noodle dirty, it is forever contaminated.
With all of the holes in the makeup of the foam, you could never be certain you’ve completely sterilized OR sanitized it. There is no lid so the waste is open all the time. Thus you might want to look at a toilet seat that clips onto a bucket like this with a closing lid.
A reader tip was to put the bag over the noodle, but then you’d need something to hold it down, or you can just use some duct tape to hold the bag in place. Either way, the toilet lid is really the better option, in my opinion, and much more comfortable for me.
Ready-Made Emergency Toilets
Campers everywhere have already come up with some awesome ideas for ready-made toilets that will be easy to store and use.
No products found.
You can also buy a complete setup like ours.
No products found.
There are also bags specially made for this setup if you want to stock them specifically.
No products found.
But you can also think of things like bedside toilets that you would use for folks in a hospital that are on metal frames. They may not store as easily and might need to be maintained a little differently by pouring the contents into a bucket set up each time. It would be easier for folks who need a little extra help up and down.
You might also want to consider if you’re having to use this for more than a few days in an open area, an enclosure to give yourself a little privacy.
Final Thoughts
Now don’t completely freak out over this stinky situation. This is one of those situations where it is easy to prepare yourself for a short-term problem. It probably won’t last more than a week or two. If, in the event of a major issue, you’ll want to look at some more permanent solutions like an outhouse. But for now, be ready for the most likely scenario!
If you enjoyed and learned from this post, you can PIN IT to save it for your library!
Katy Willis is a writer, lifelong homesteader, and master herbalist, master gardener, and canine nutritionist. Katy is a preparedness expert and modern homesteader practicing everyday preparedness, sustainability, and a holistic lifestyle.
She knows how important it is to be prepared for whatever life throws at you, because you just never know what's coming. And preparedness helps you give your family the best chance to thrive in any situation.
Katy is passionate about living naturally, growing food, keeping livestock, foraging, and making and using herbal remedies. Katy is an experienced herbalist and a member of the CMA (Complementary Medical Association).
Her preparedness skills go beyond just being "ready", she's ready to survive the initial disaster, and thrive afterward, too. She grows 100% organic food on roughly 15 acres and raises goats, chickens, and ducks. She also lovingly tends her orchard, where she grows many different fruit trees. And, because she likes to know exactly what she's feeding her family, she's a seasoned from-scratch cook and gluten-free baker.
Katy teaches foraging and environmental education classes, too, including self-sufficient living, modern homesteading, seed saving, and organic vegetable gardening.
Katy helps others learn forgotten skills, including basic survival skills and self-reliance.
She's been published on sites such as MSN, Angi, Home Advisor, Family Handyman, Wealth of Geeks, Readers Digest, and more.
Last update on 2024-07-26 at 23:06 / Affiliate links / Images from Amazon Product Advertising API
